
Adding a Simple Hanger to Your Mini Quilt
Adding a simple hanger to your mini quilt while you are adding your binding. It can be done in seconds.

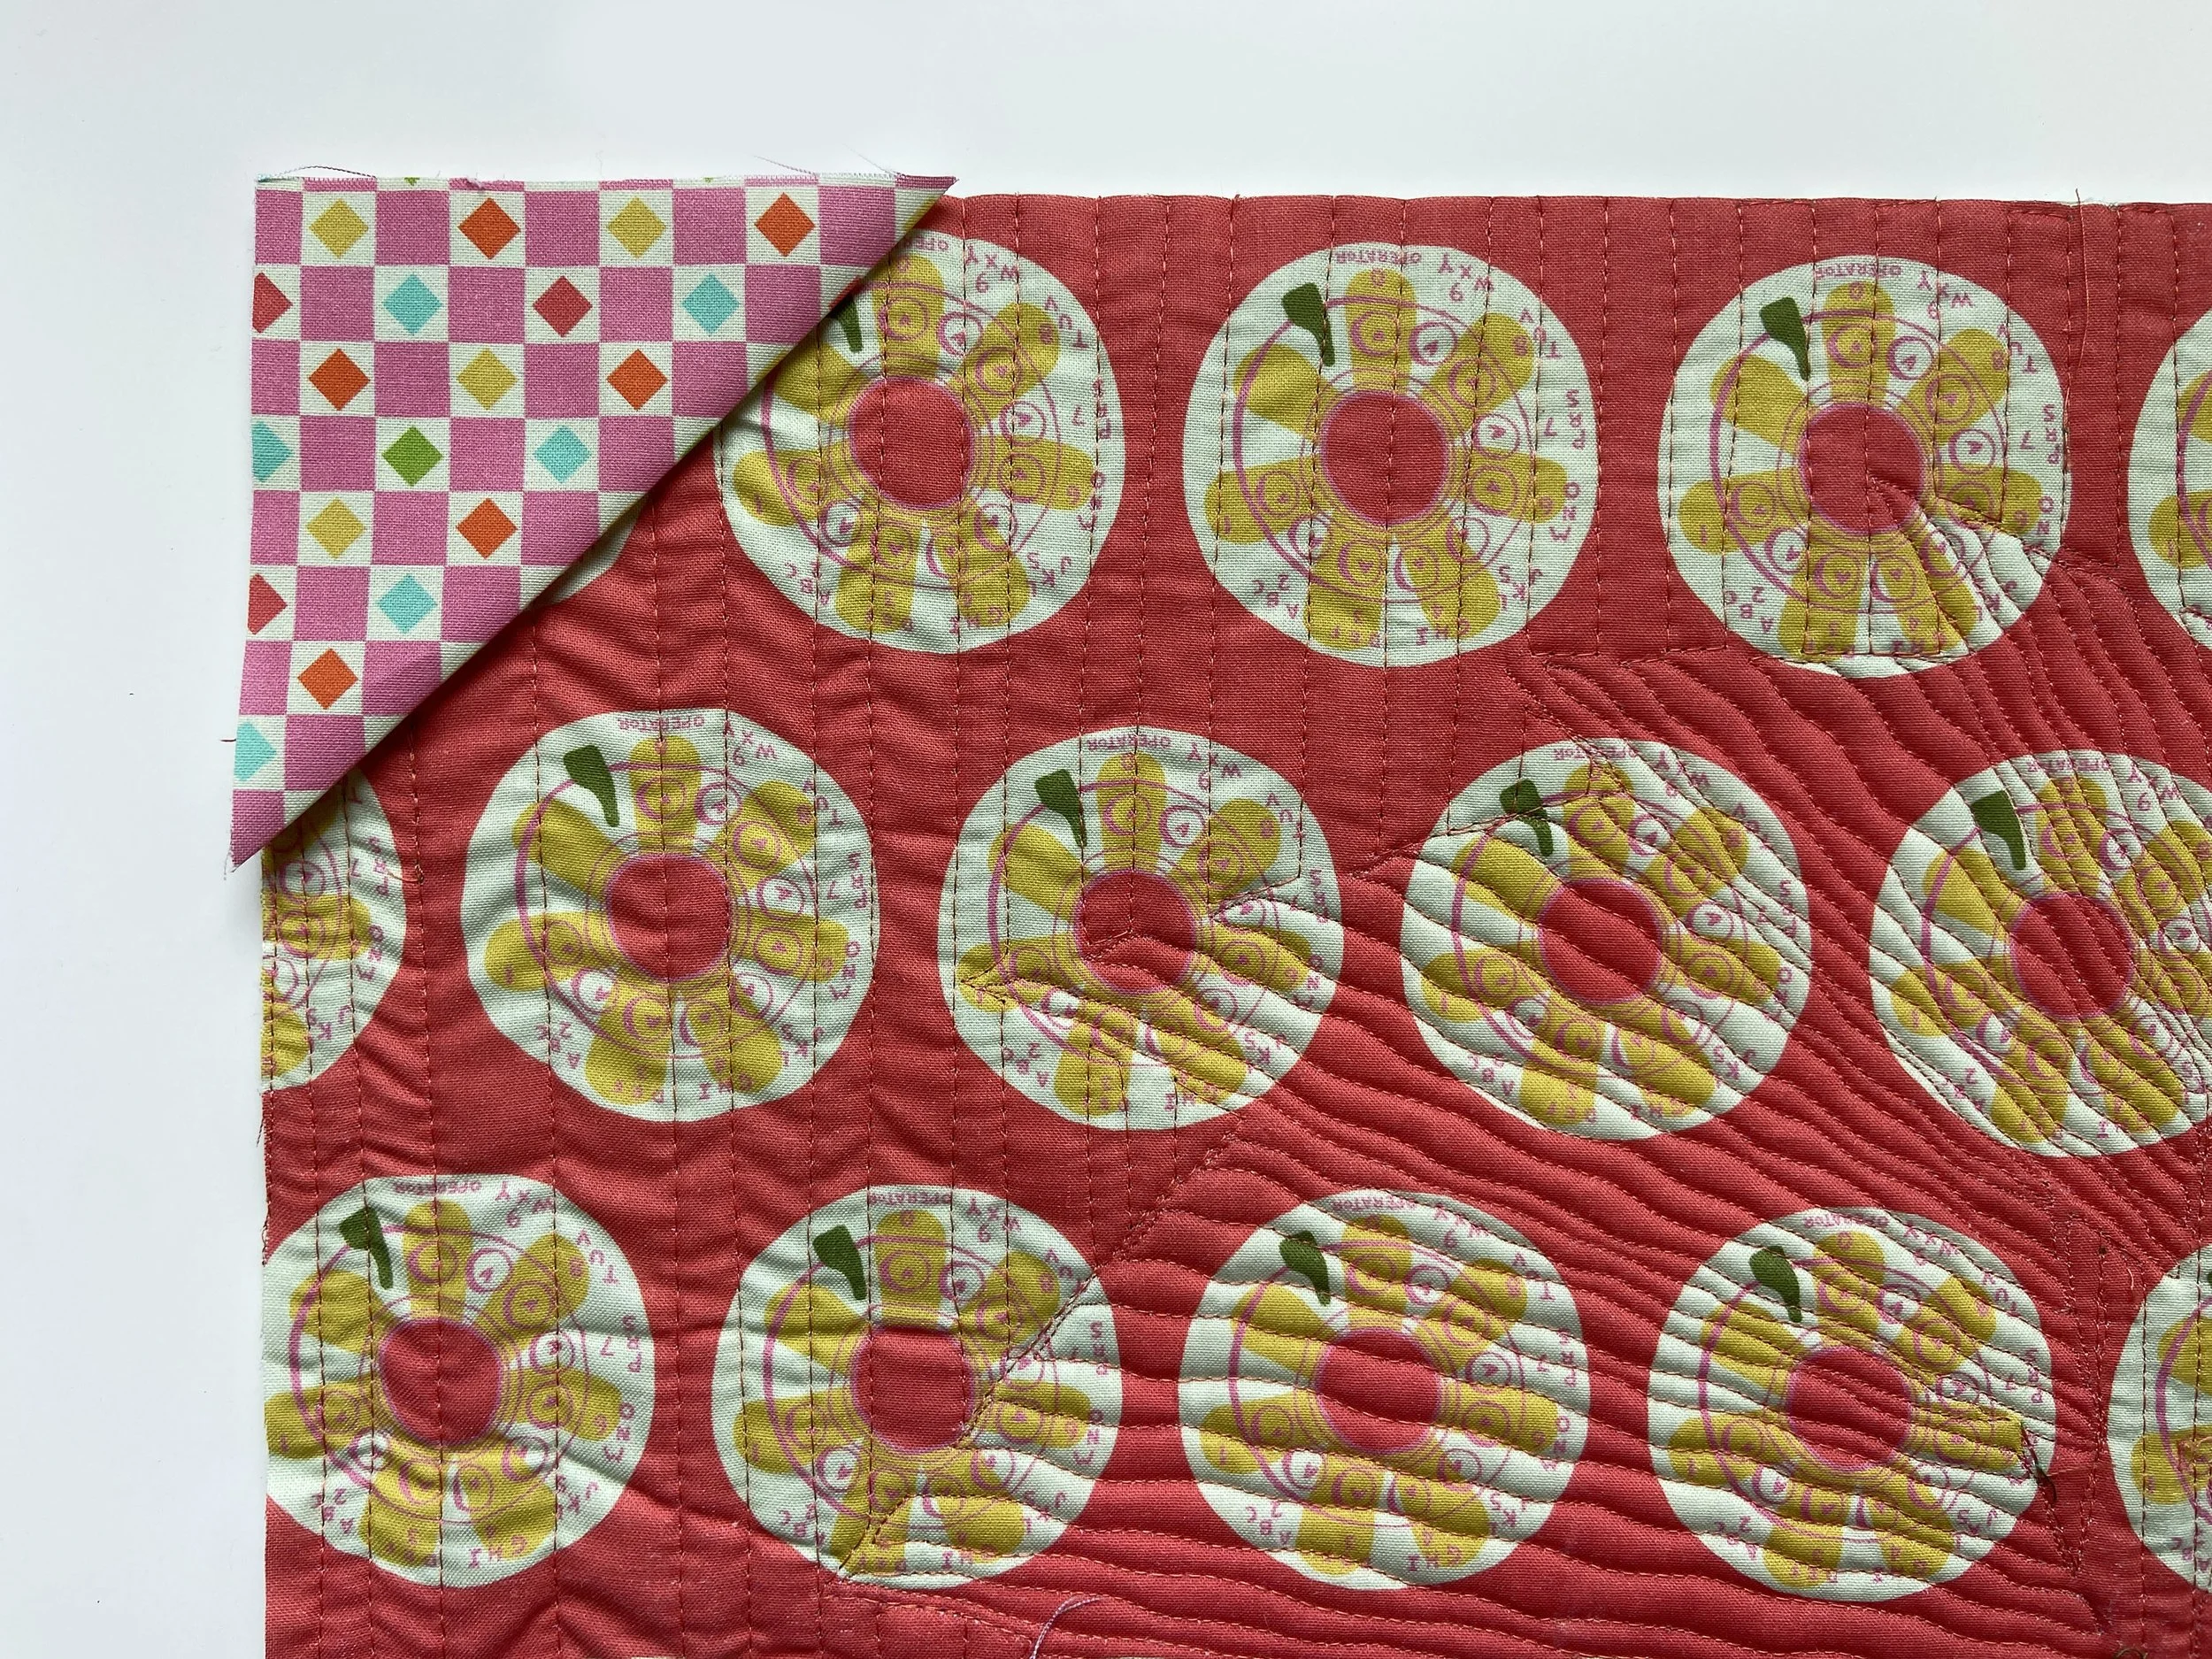
Step 1: Cut 2 squares 3.5" and press them flat.

Step 2: Fold them on the diagonal and press a crease into each one.
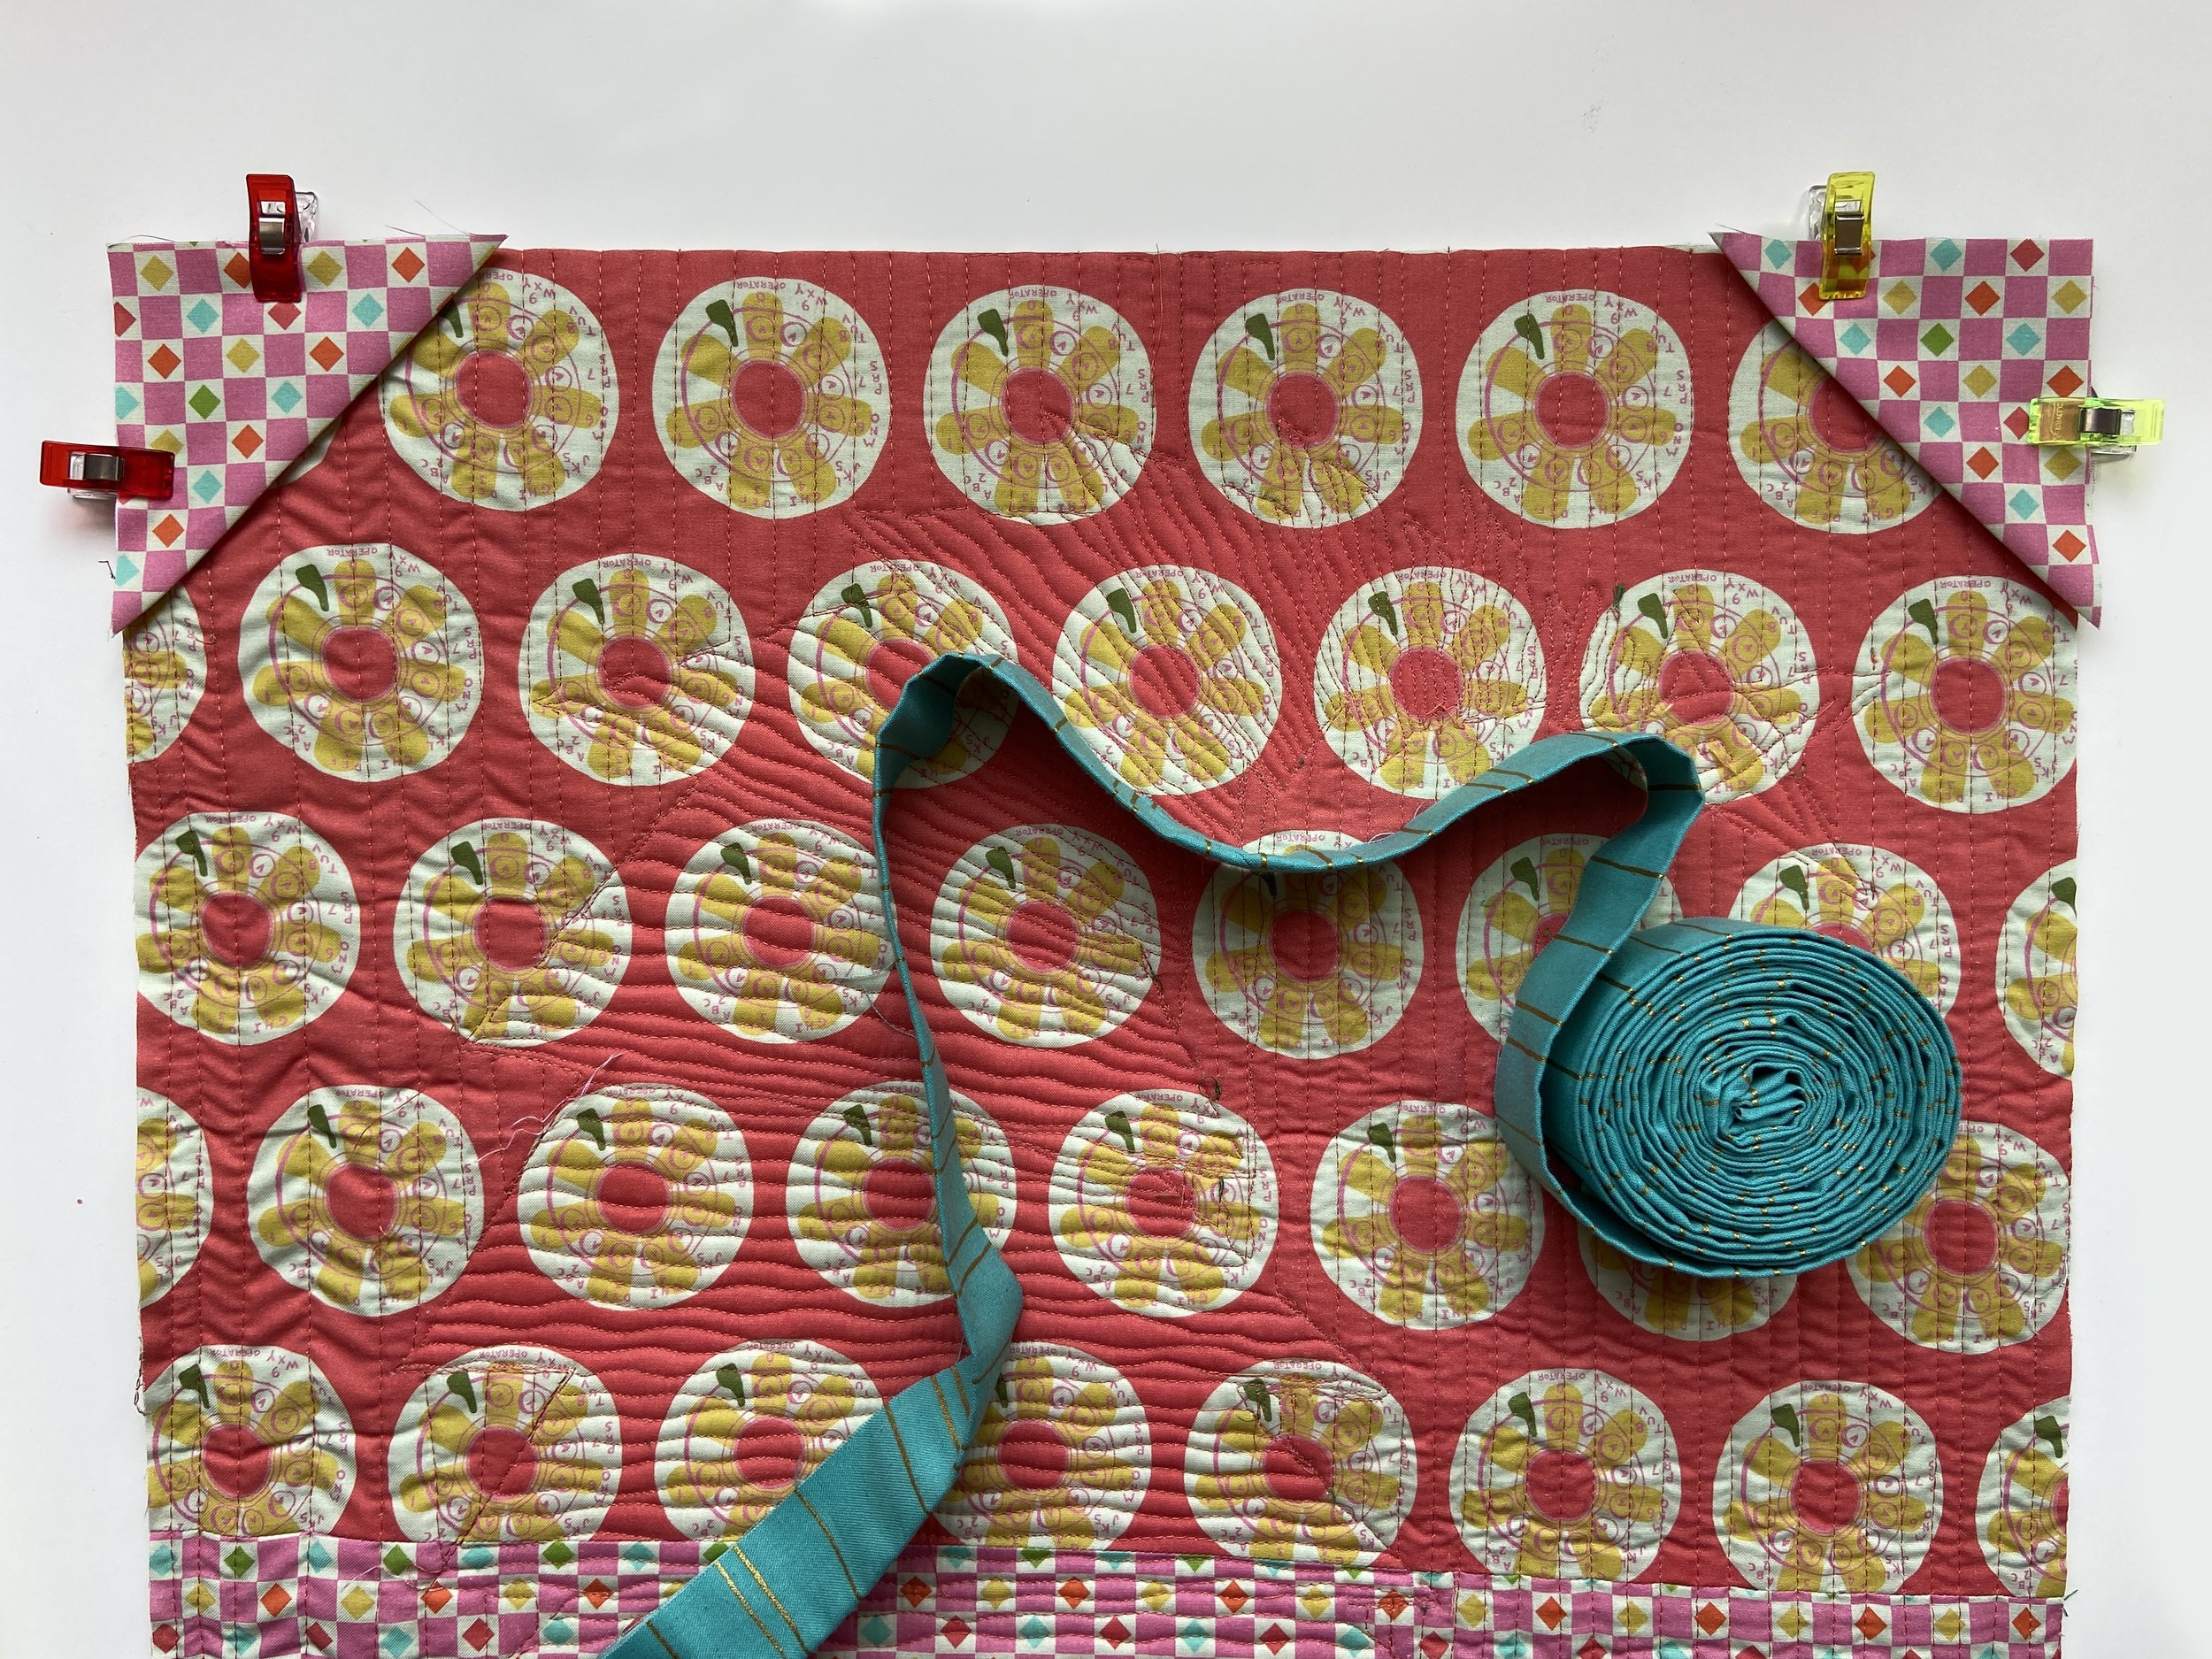
Step 3: Line up the raw edges of each to the top corners of the quilt back and clip in place.

Step 4: If you are adding your binding by machine as I did, line the raw edges of your binding up with one side of the quilt edge and place the binder over your triangle hanger. Clip at least once to hold in place.

Step 5: Stitch your binding down being careful to keep the hanger and edges of the quilt and binding in line with each other. Sew on binding as you normally would.


Step 6: Don't forget your label.

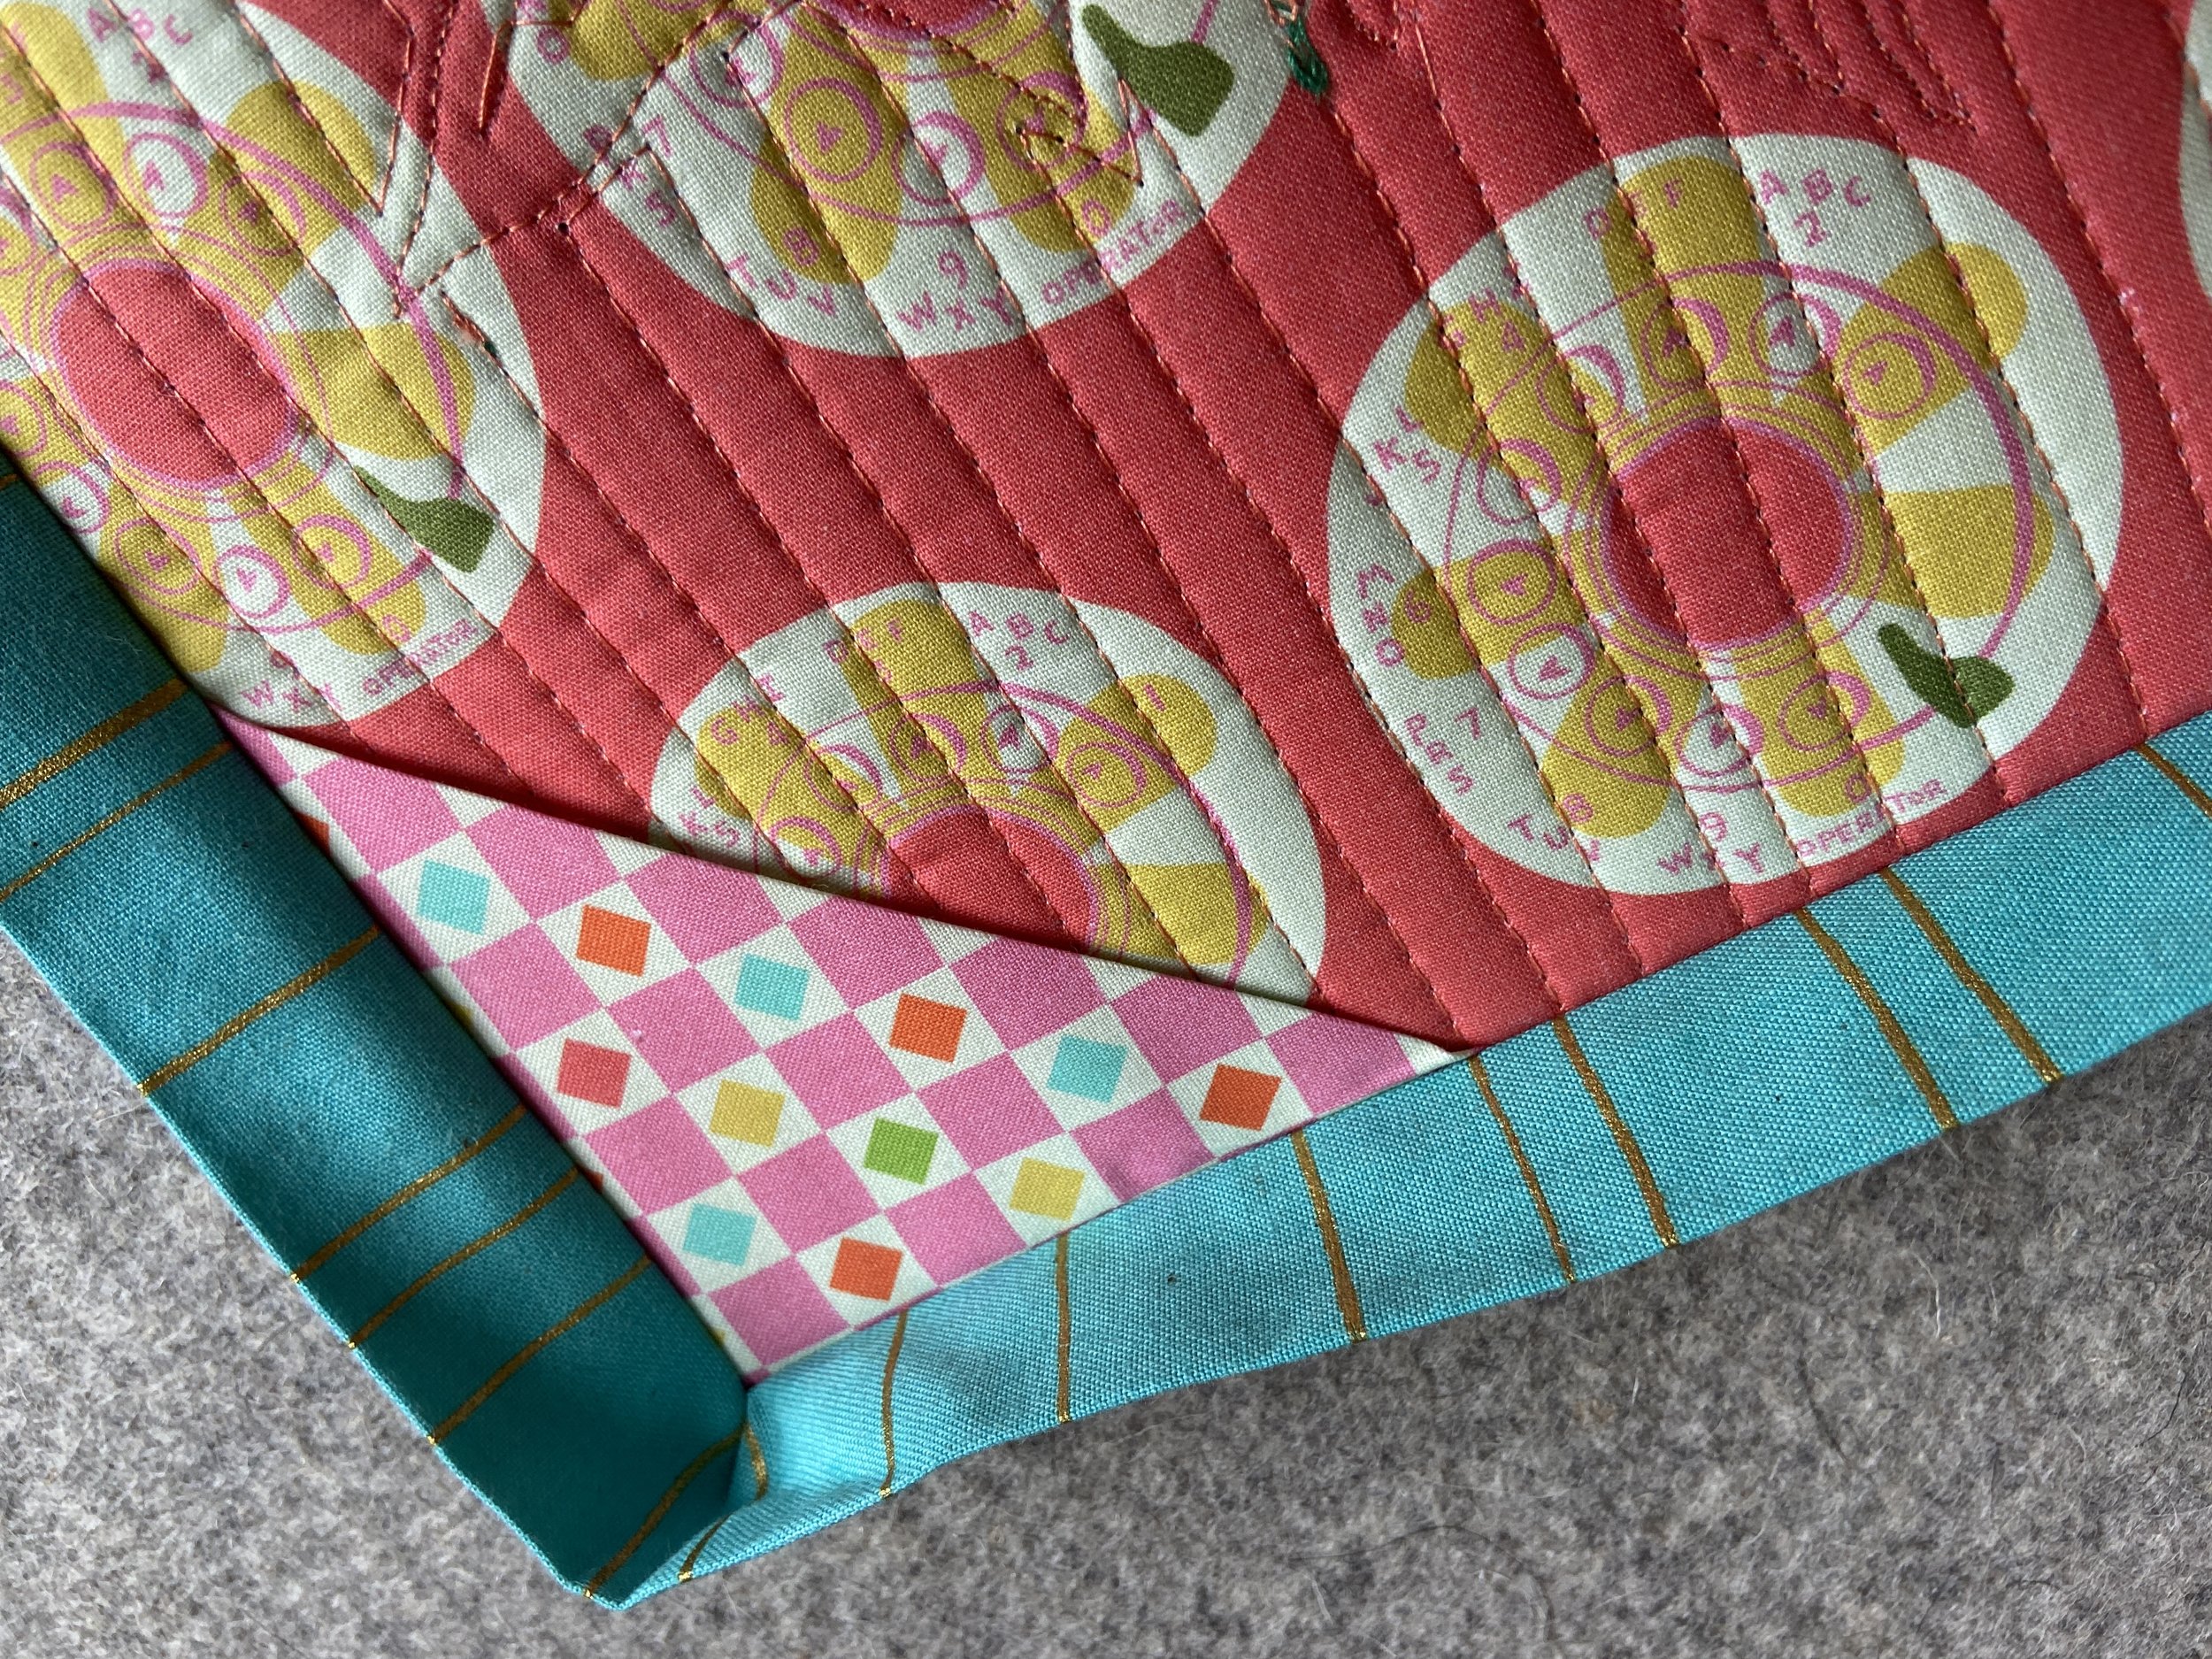
Step 7: Press the binding back and stitch down the other side using your preferred method.
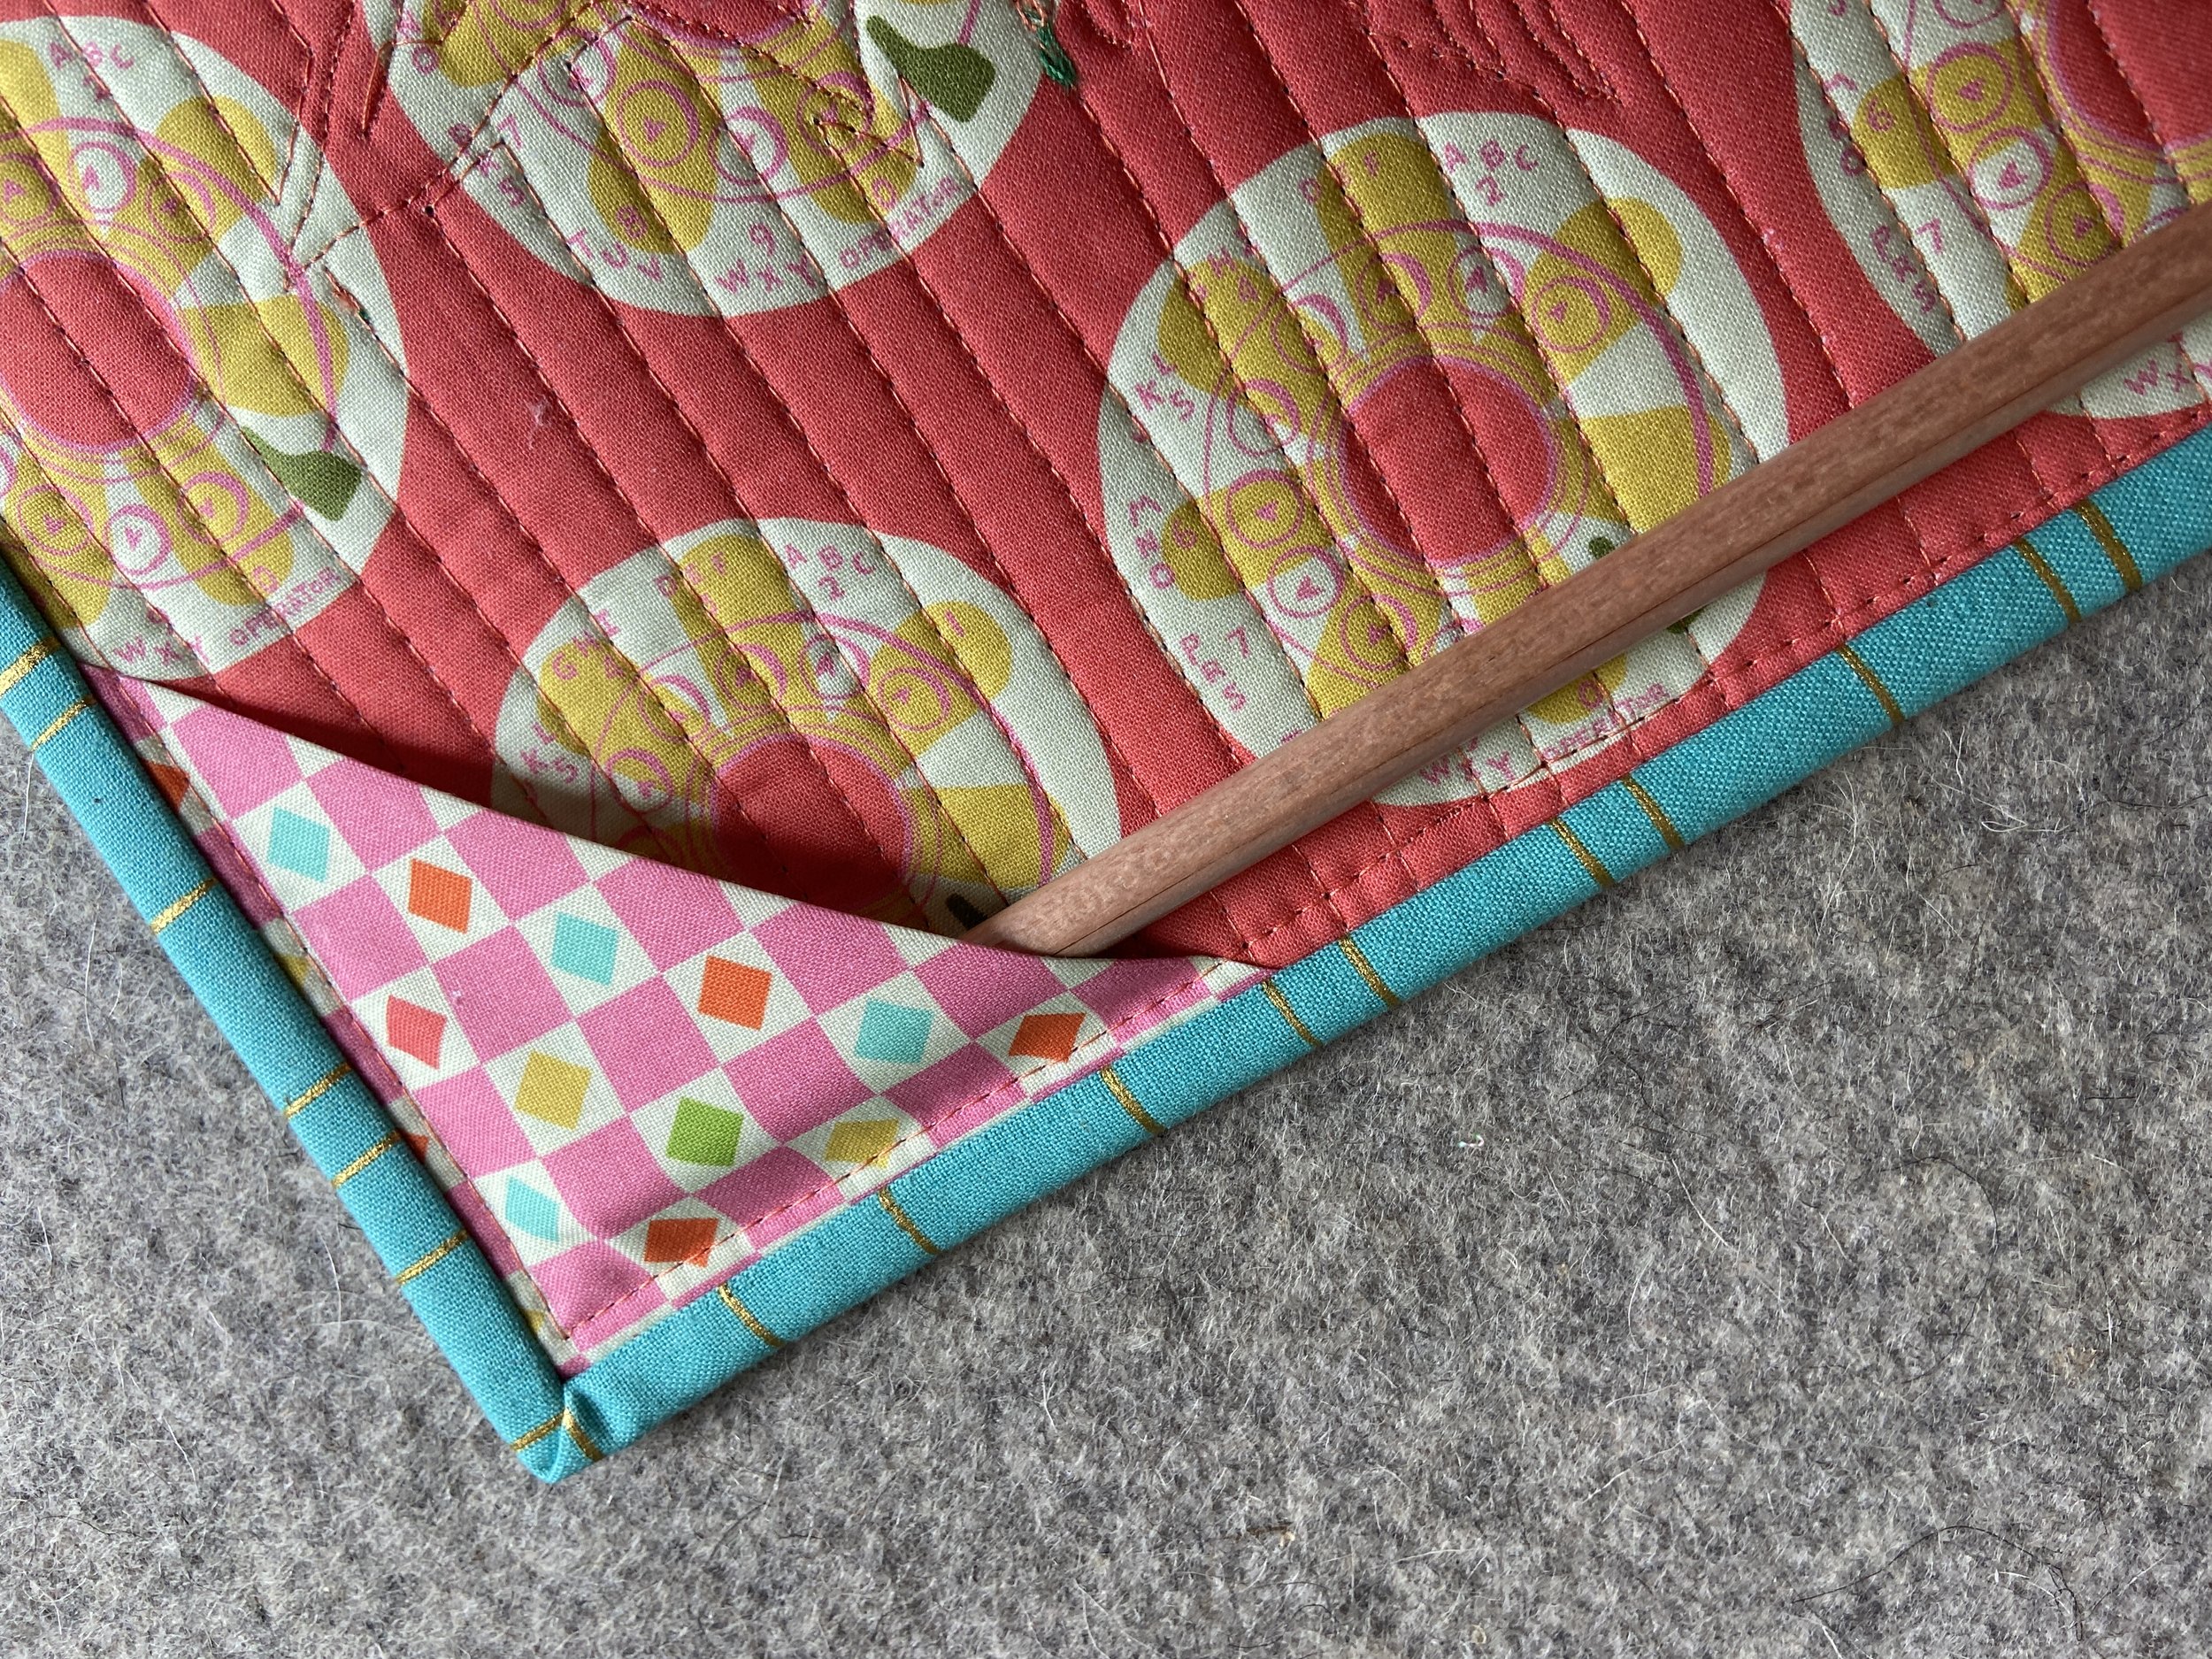
Step 8: Cut a small dowel rode the width of your mini quilt and insert it into the triangles as your hanger.
